Adding a trusted publisher to an existing PyPI project
Adding a trusted publisher to a PyPI project only requires a single setup step.
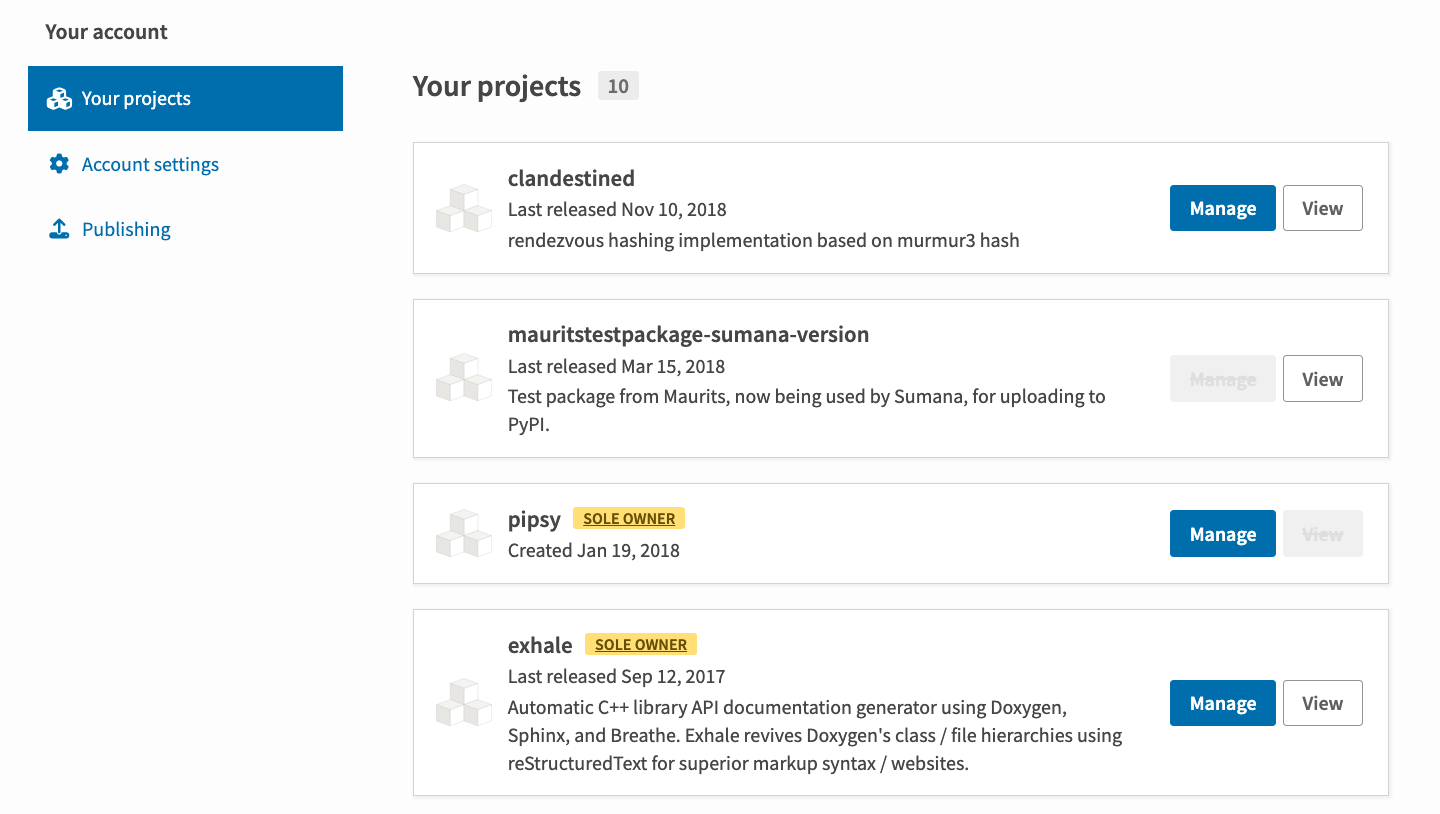
On the "Your projects" page, click "Manage" on any project you'd like to configure:
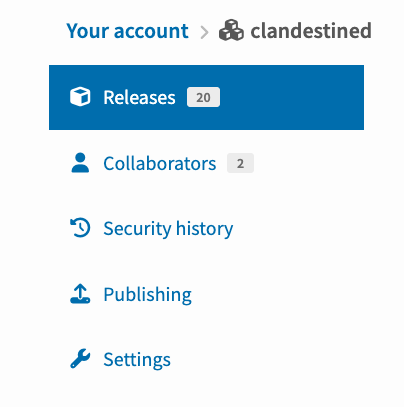
Then, click on "Publishing" in the project's sidebar:
That link will take you to the publisher configuration page for the project, which will allow you to configure trusted publishers for the different platforms supported by PyPI (such as GitHub Actions).
To enable a publisher, you need to tell PyPI how to trust it. Each trusted publisher has its own configuration requirements; click the tabs below to see each.
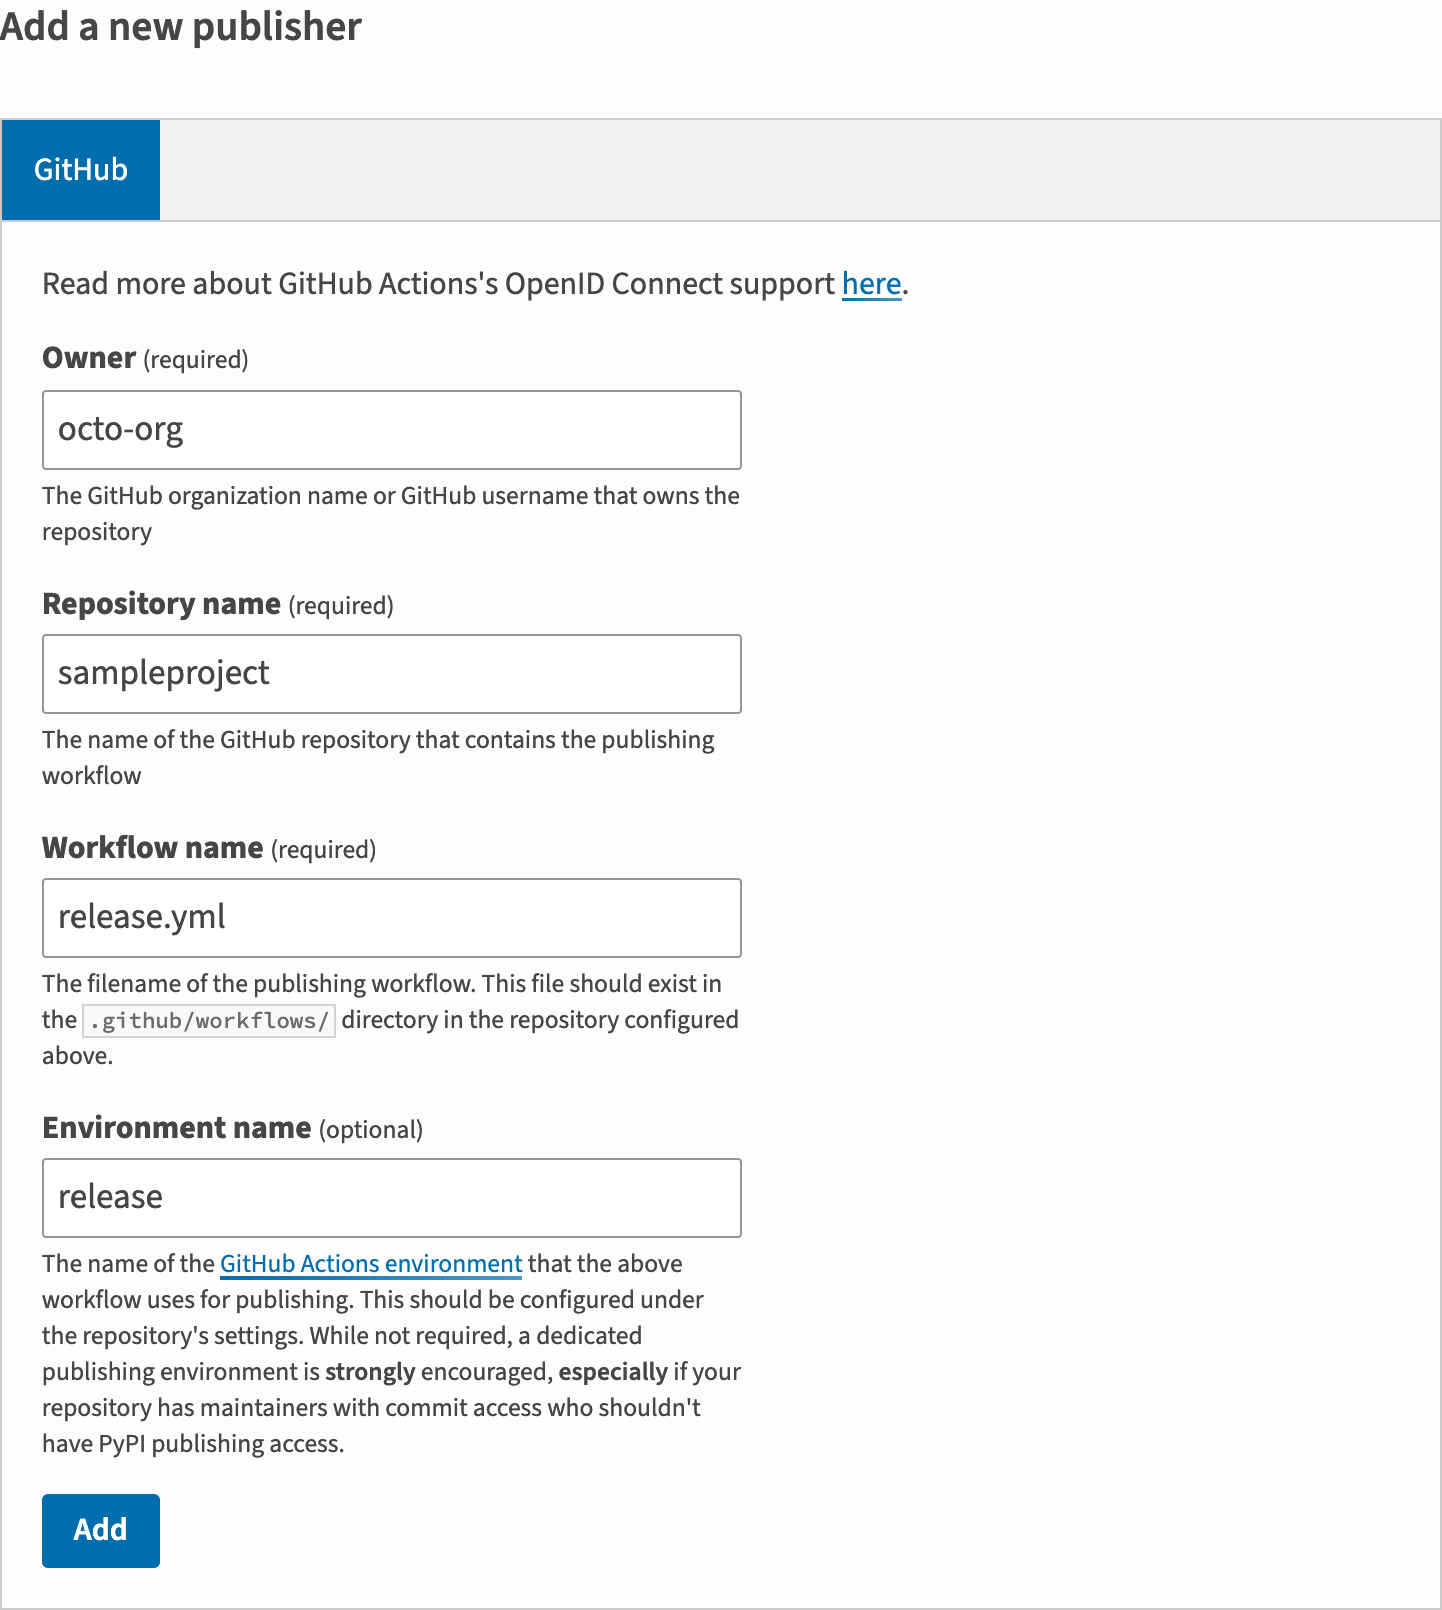
For GitHub Actions, you must provide the repository owner's name, the repository's name, and the filename of the GitHub Actions workflow that's authorized to upload to PyPI. In addition, you may optionally provide the name of a GitHub Actions environment.
For example, if you have a project at https://github.com/octo-org/sampleproject
that uses a publishing workflow defined in .github/workflows/release.yml
and a custom environment named release, then you'd do the following:
Note
Configuring an environment is optional, but strongly recommended: with a GitHub environment, you can apply additional restrictions to your trusted workflow, such as requiring manual approval on each run by a trusted subset of repository maintainers.
Once you click "Add", your publisher will be registered and will appear at the top of the page:
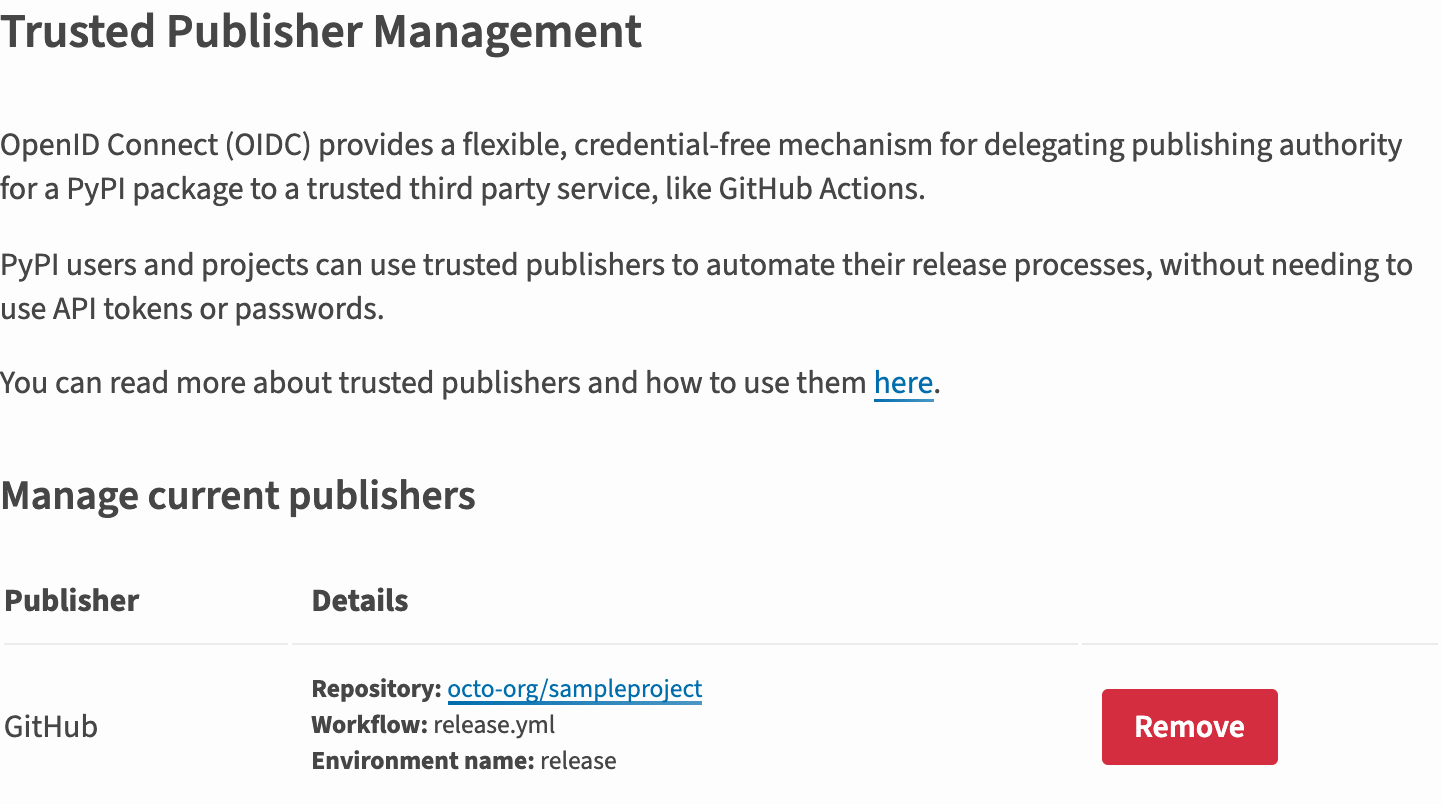
From this point onwards, the release.yml workflow on octo-org/sampleproject will
be able to generate short-lived API tokens from PyPI for the project you've registered
it against.
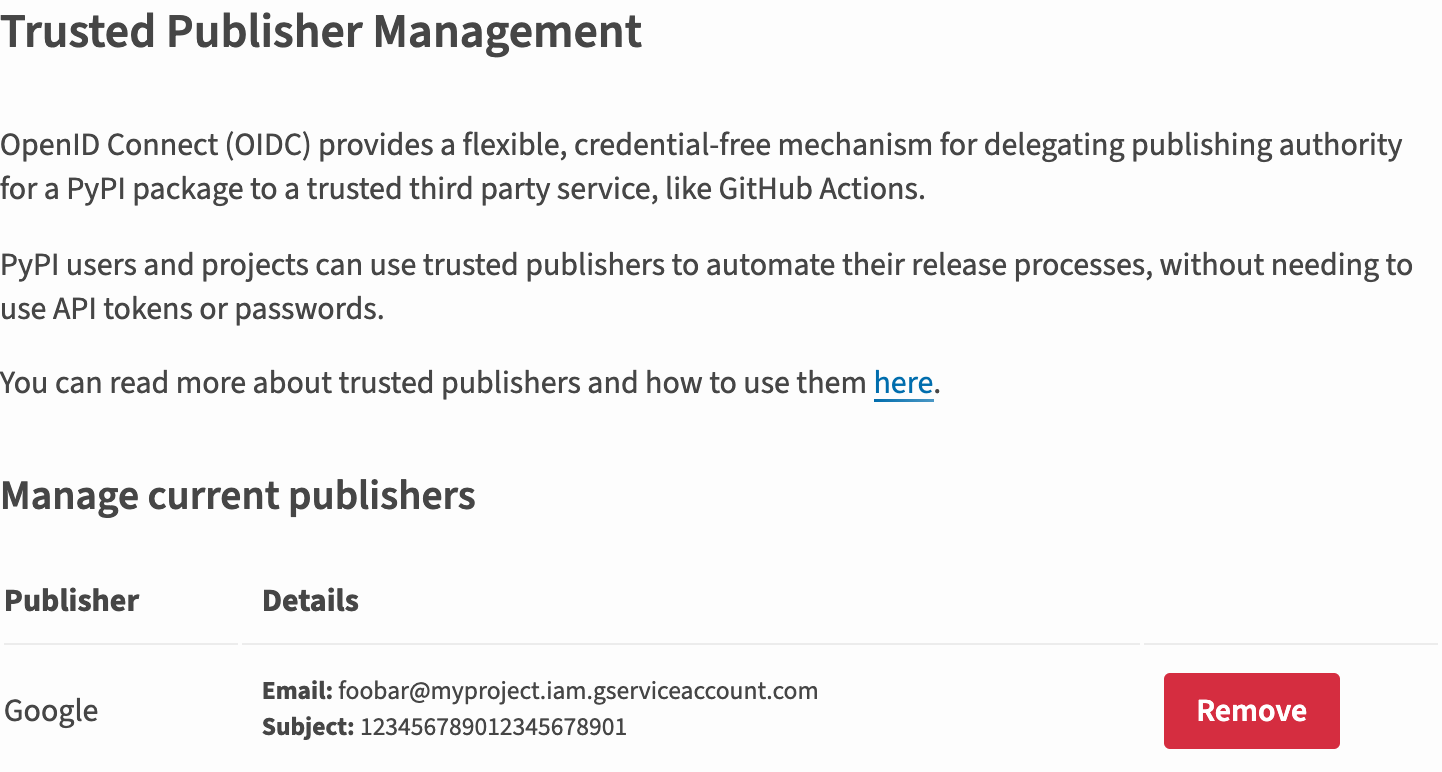
For Google Cloud, you must provide the email address of the account or service account used to publish. You can learn more about Google Cloud service accounts here.
For example, if you have created a service account named
"SERVICE_ACCOUNT_NAME" in the project "PROJECT_NAME" which is in use by
the environment where you would like to publish to PyPI from, your service
account email would take the form
SERVICE_ACCOUNT_NAME@PROJECT_NAME.iam.gserviceaccount.com, and you would do
the following:

Warning
Google Cloud also provides default service accounts for various products:
- Compute Engine:
PROJECT_ID-compute@developer.gserviceaccount.com - App Engine:
PROJECT_NAME@appspot.gserviceaccount.com
However it is not recommended that these be used for publishing, as they are provided by default to every service when they are created.
Note
Configuring the subject is optional. The subject is the numeric ID that represents the principal making the request. While not required, providing the subject further restricts the identity which is used for publishing, ensuring that only a specific instance of a service account can publish, not any service account with the configured email. See https://cloud.google.com/docs/authentication/token-types#id-contents for more details
Once you click "Add", your publisher will be registered and will appear at the top of the page:
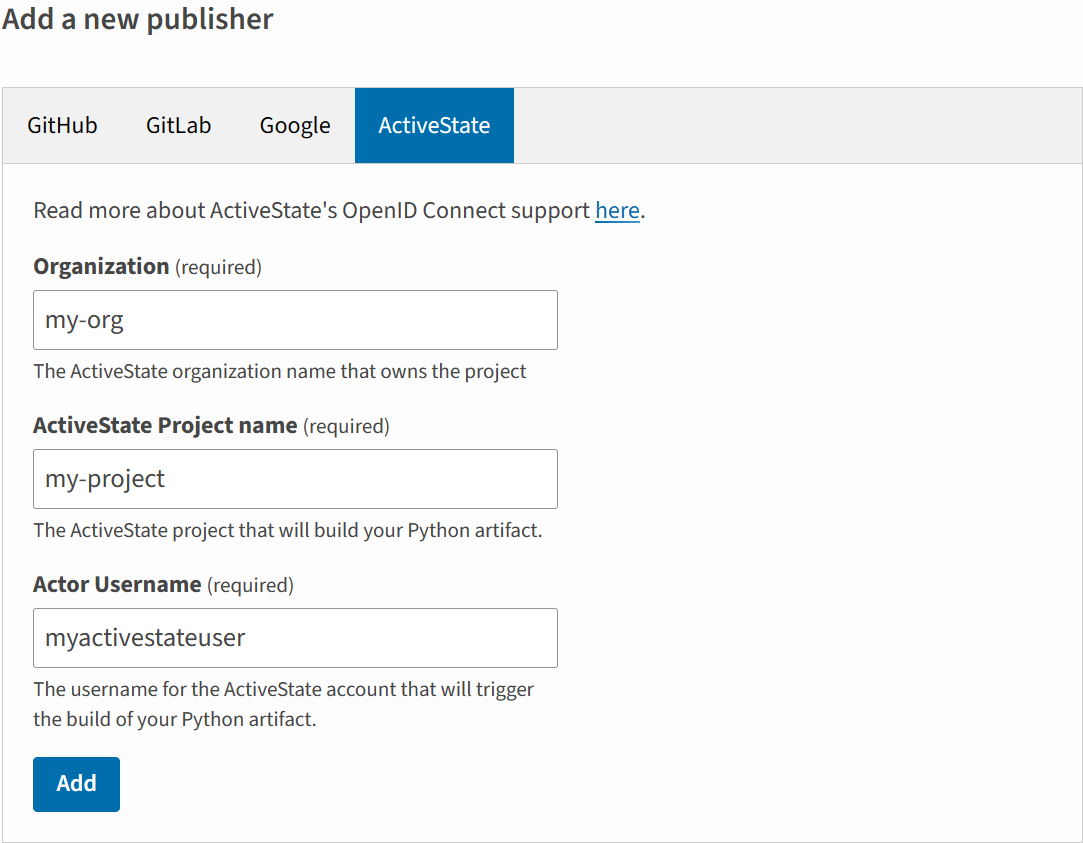
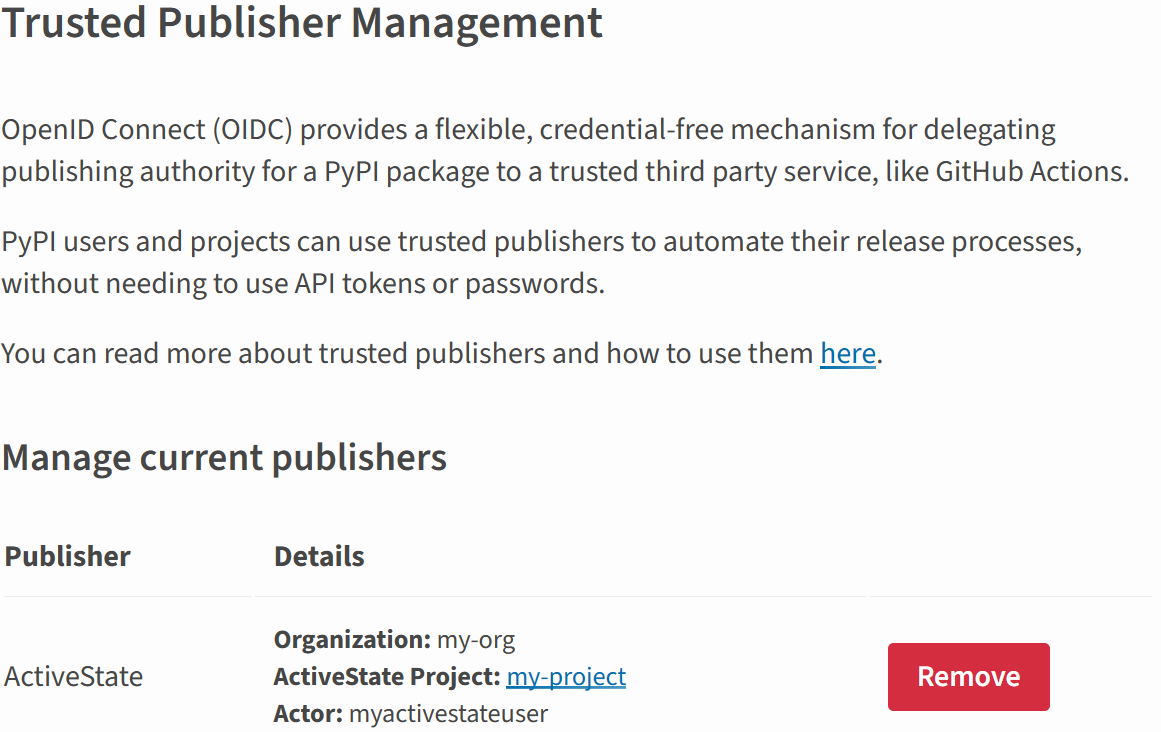
For ActiveState, you must provide the name of the ActiveState project,
the ActiveState organization that project belongs to, and the ActiveState user performing
the publish action. Learn more about getting set up on the ActiveState Platform here.
 Once you click "Add", your publisher will be registered and will appear at the top of the page:
Note
Currently, only projects hosted on https://gitlab.com are supported. Self-managed instances are not supported.
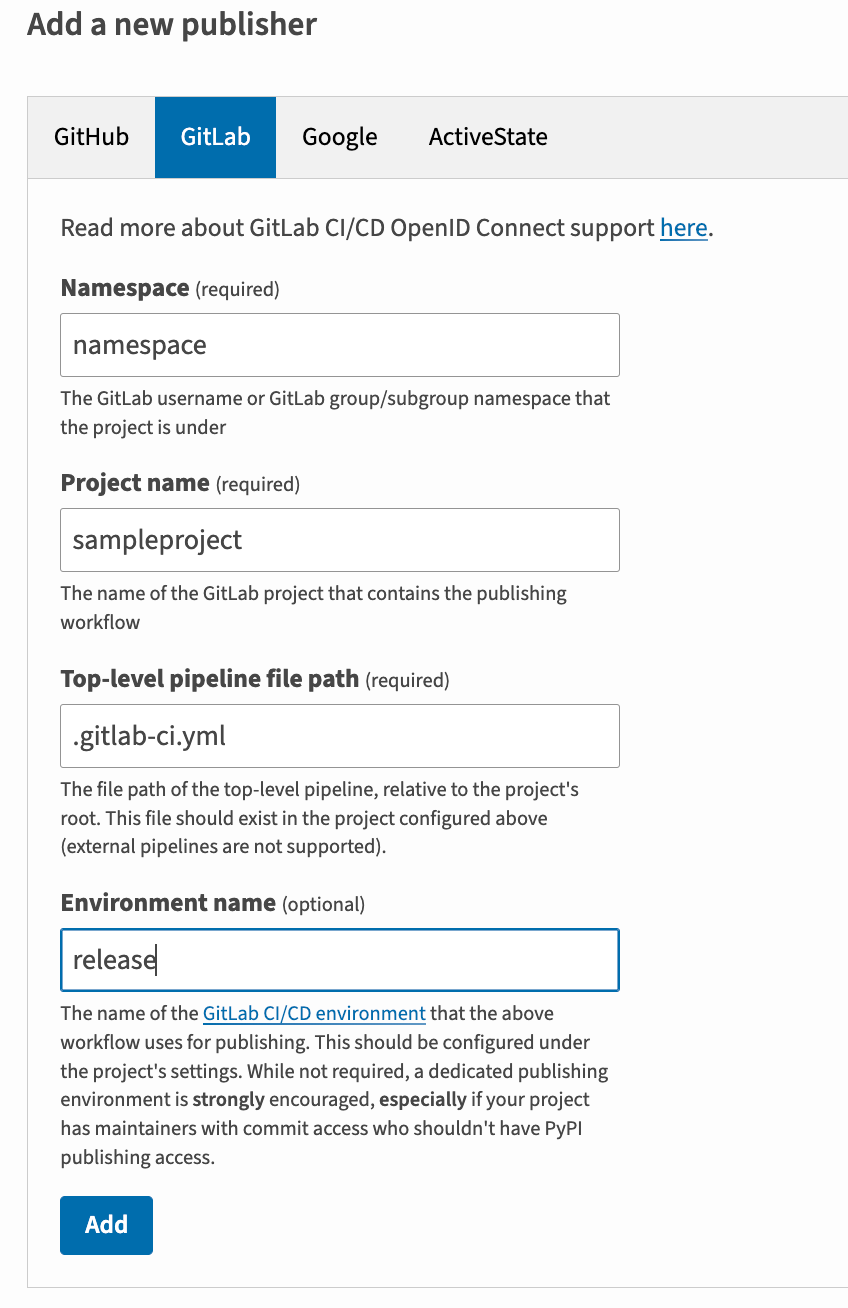
For GitLab CI/CD, you must provide the repository's namespace, the repository's name, and the filepath of the GitLab CI/CD workflow that's authorized to upload to PyPI. In addition, you may optionally provide the name of a GitLab CI/CD environment.
For example, if you have a project at https://gitlab.com/namespace/sampleproject
that uses a publishing workflow defined in release.yml and a custom
environment named release, then you'd do the following:
Note
Configuring an environment is optional, but strongly recommended: with a GitLab environment, you can apply additional restrictions to your trusted workflow, such as requiring manual approval on each run by a trusted subset of repository maintainers.
Once you click "Add", your publisher will be registered and will appear at the top of the page:

From this point onwards, the release.yml workflow on namespace/sampleproject
will be able to generate short-lived API tokens from PyPI for the project you've
registered it against.
A publisher can be registered against multiple PyPI projects (e.g. for a multi-project repository), and a single PyPI project can have multiple publishers (e.g. for multiple workflows on different architectures, operating systems).