Creating a PyPI project with a Trusted Publisher
Trusted Publishers are not just for pre-existing PyPI projects: you can also use them to create a PyPI project!
This again reduces the number of steps needed to set up a fully automated PyPI publishing workflow: rather than having to manually upload a first release to "prime" the project on PyPI, you can configure a "pending" publisher that will create the project when used for the first time. "Pending" publishers are converted into "normal" publishers on first use, meaning that no further configuration is required.
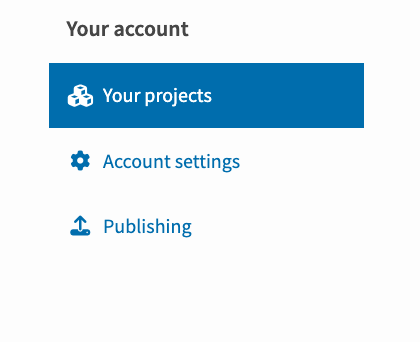
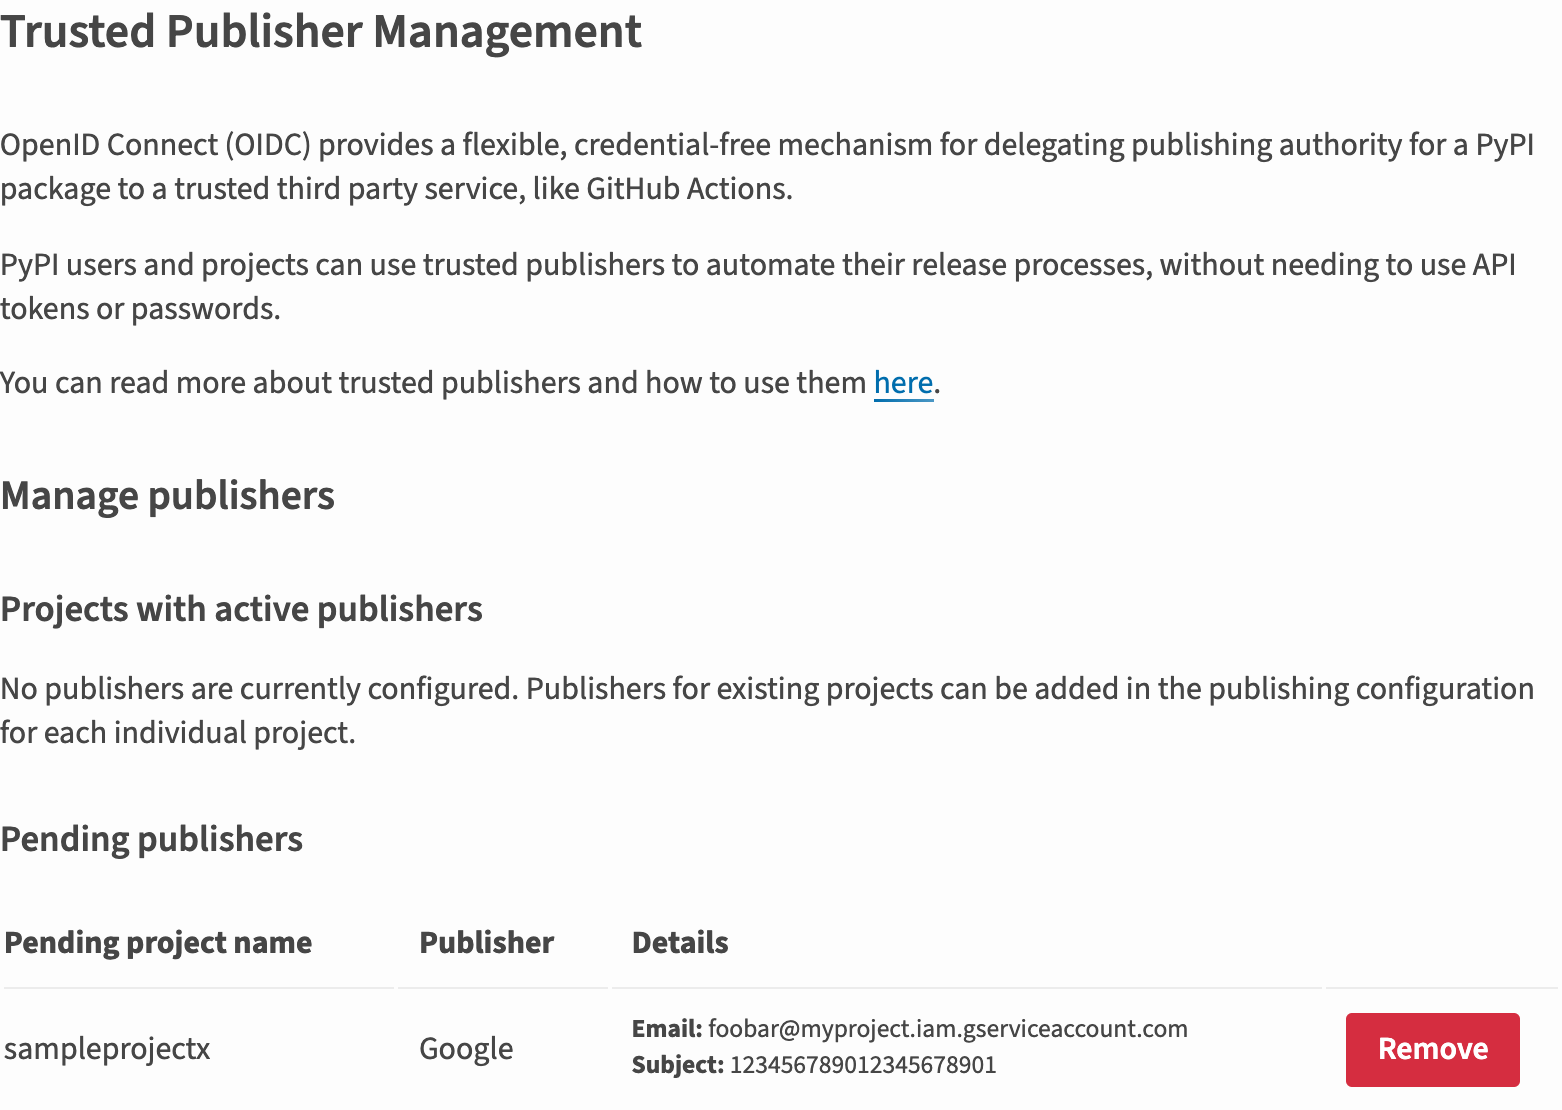
The steps for configuring a "pending" publisher are similar to those for a normal publisher, except that the page is under your account sidebar instead of any project's sidebar (since the project doesn't exist yet):
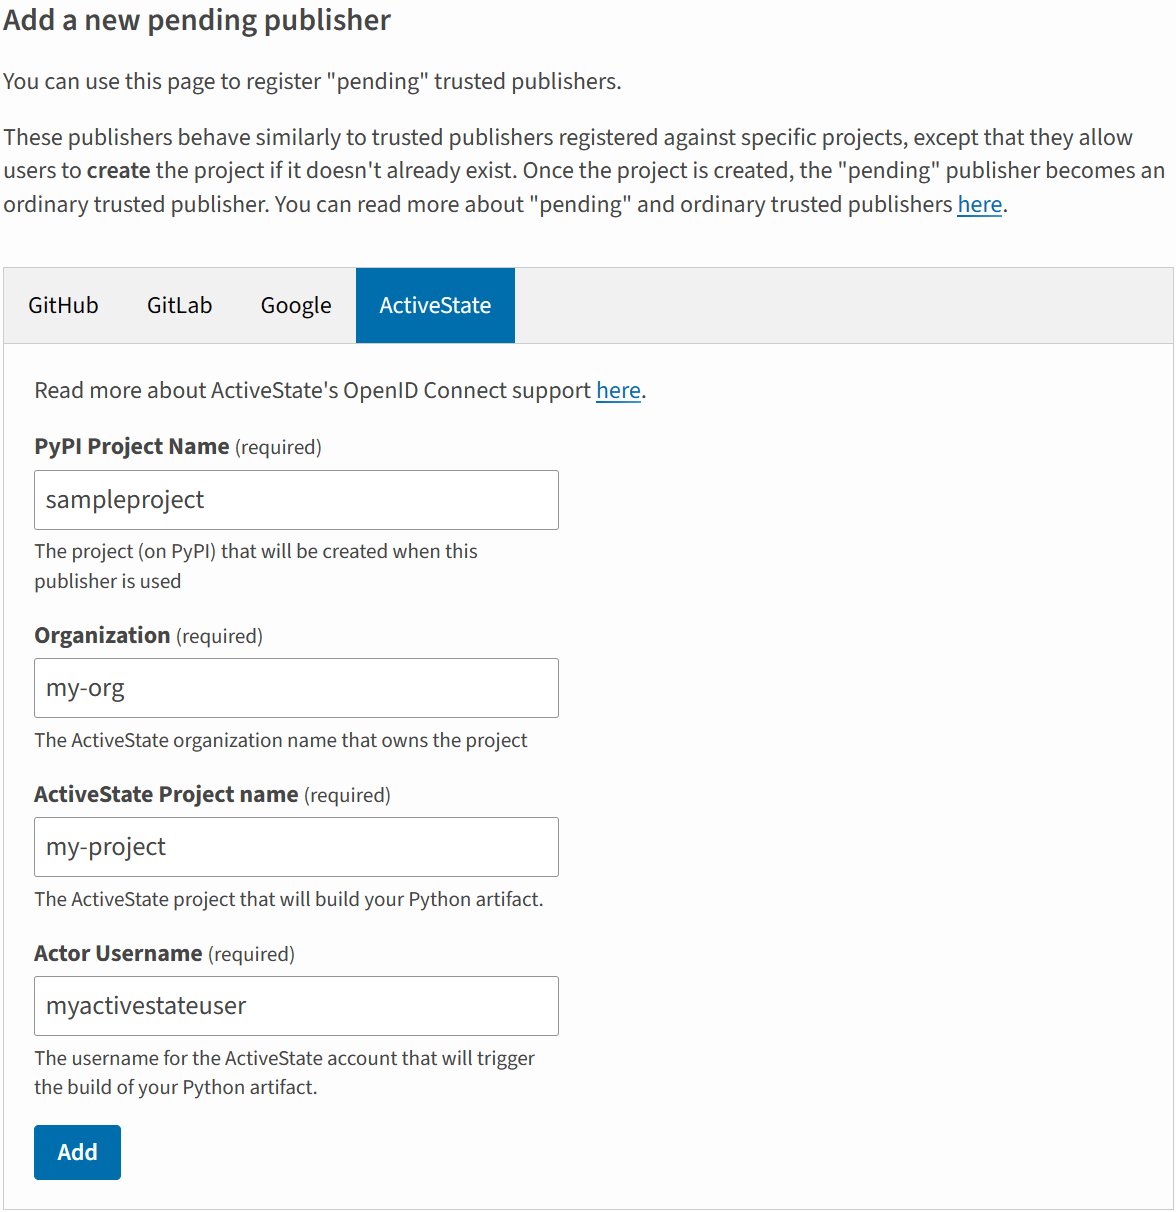
Clicking on "publishing" will bring you to a page with different potential Trusted Publishers. The forms on this page behave the same as with publishers for existing projects, except that you also need to provide the name of the PyPI project that will be created.
Important
A "pending" publisher does not create a project or reserve a project's name until it is actually used to publish.
If you create a "pending" publisher but another user registers the project name before you actually publish to it, your "pending" publisher will be invalidated.
If you have a repository at
https://github.com/octo-org/sampleproject with a release workflow at
release.yml and an environment named pypi that you would like to publish
to PyPI as sampleproject, then you would do the following:
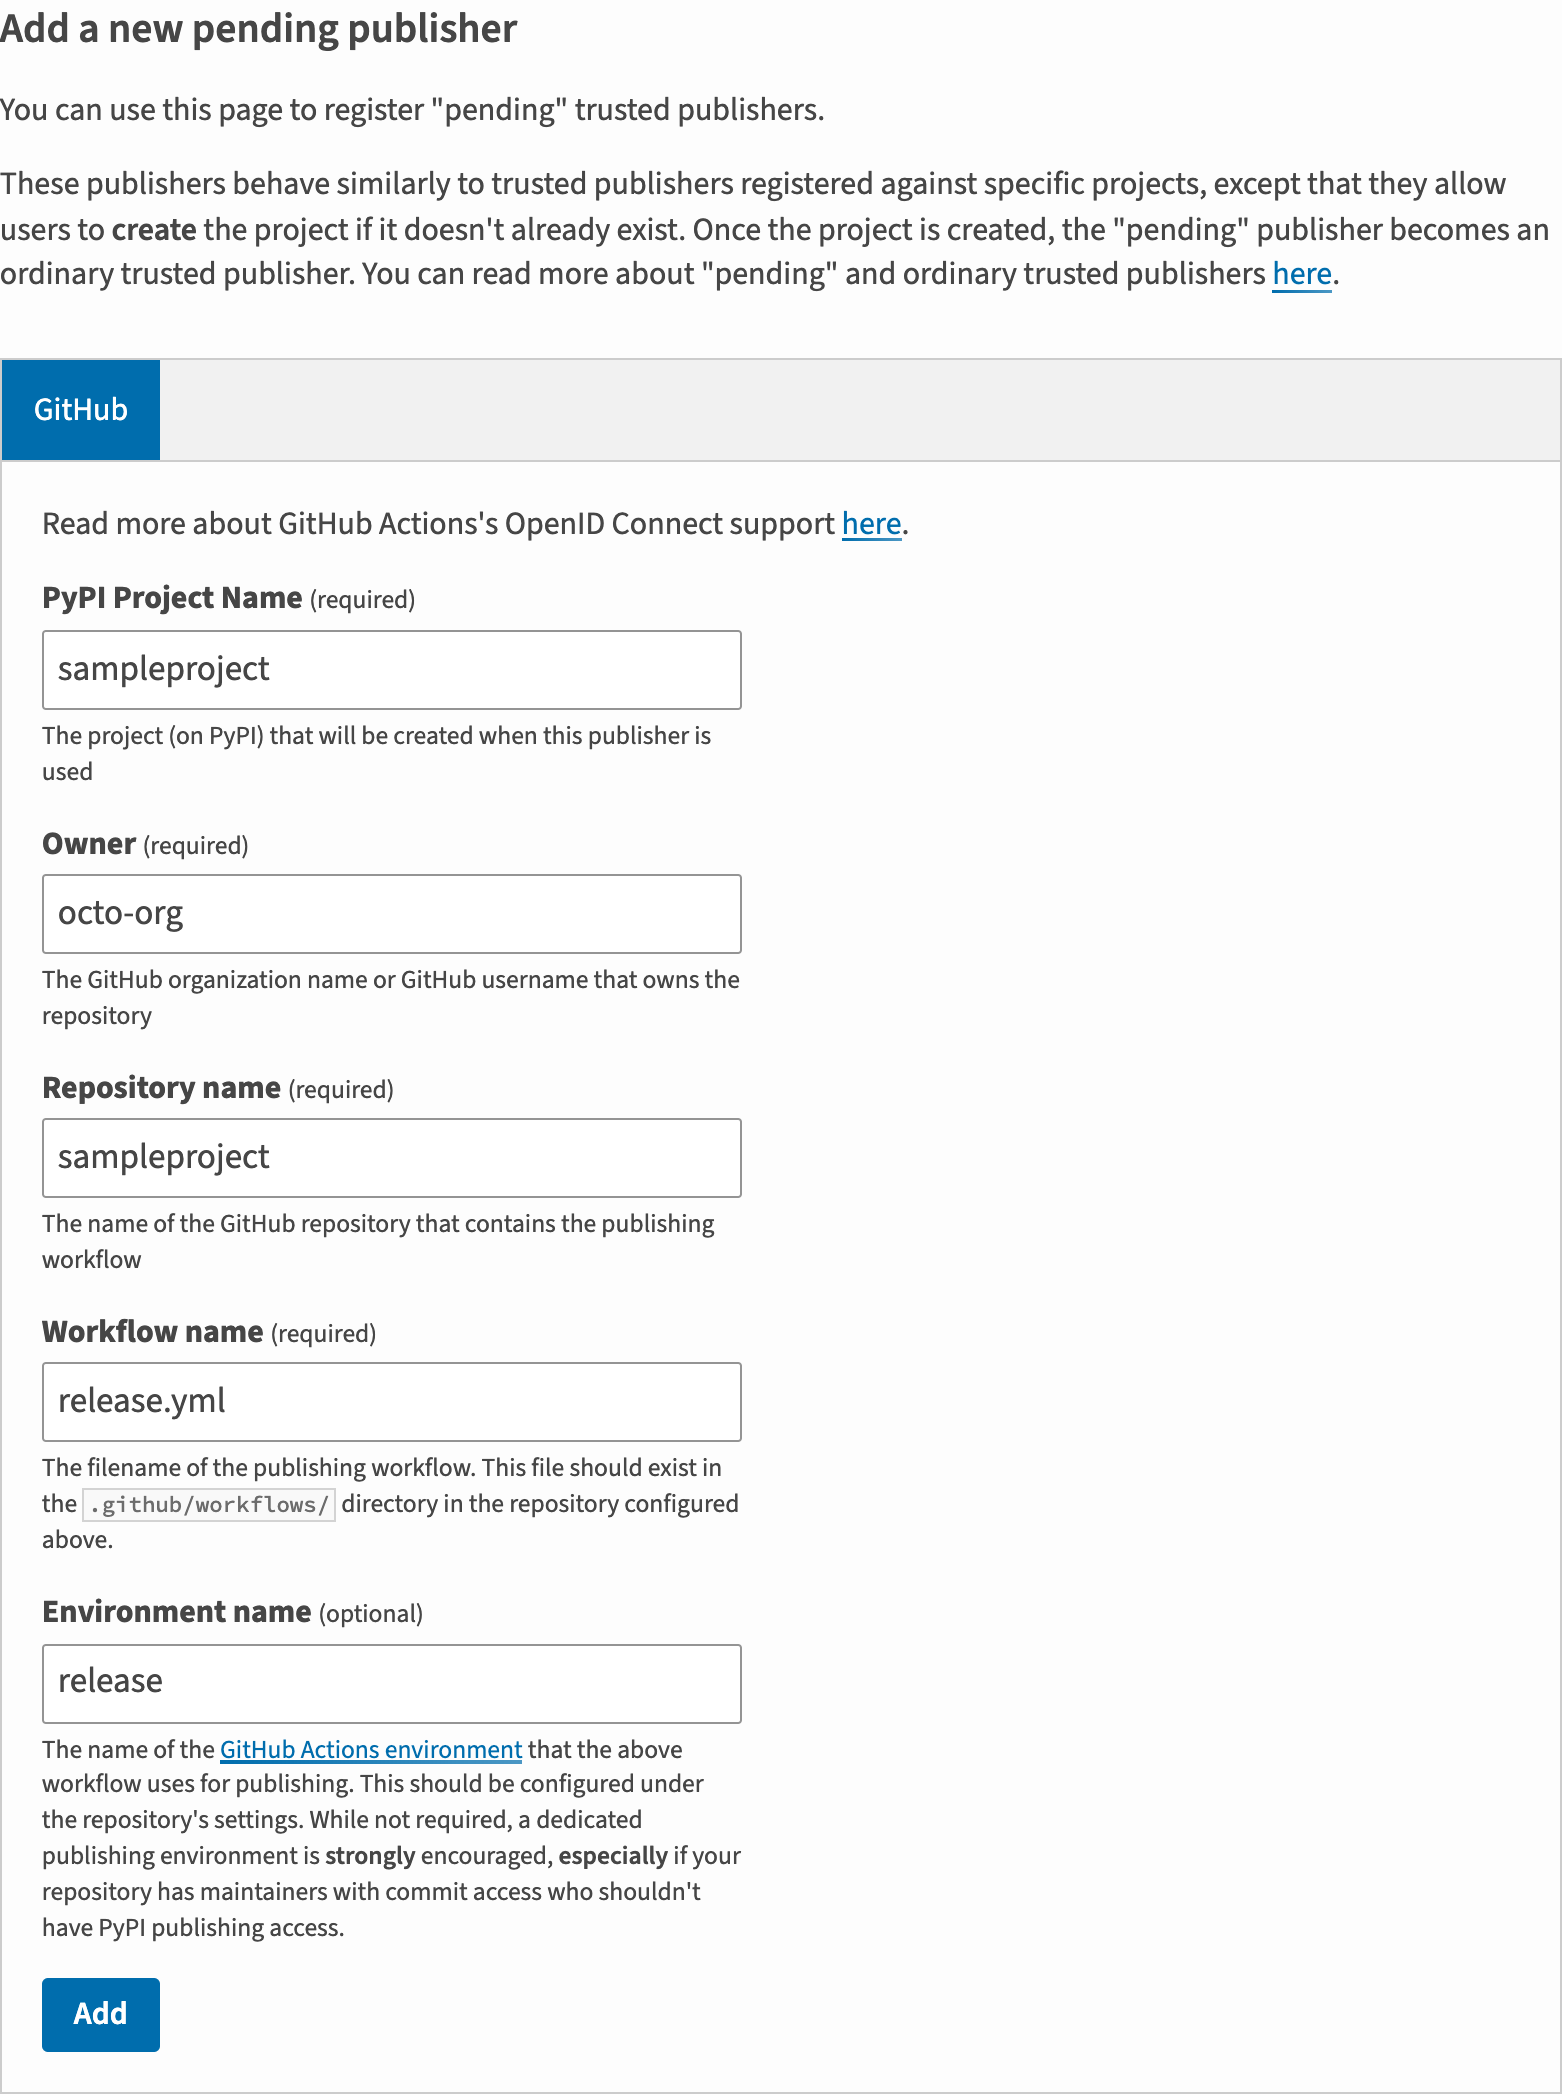
Note
Like with "normal" Trusted Publishing, configuring a GitHub Actions environment is optional but strongly recommended.
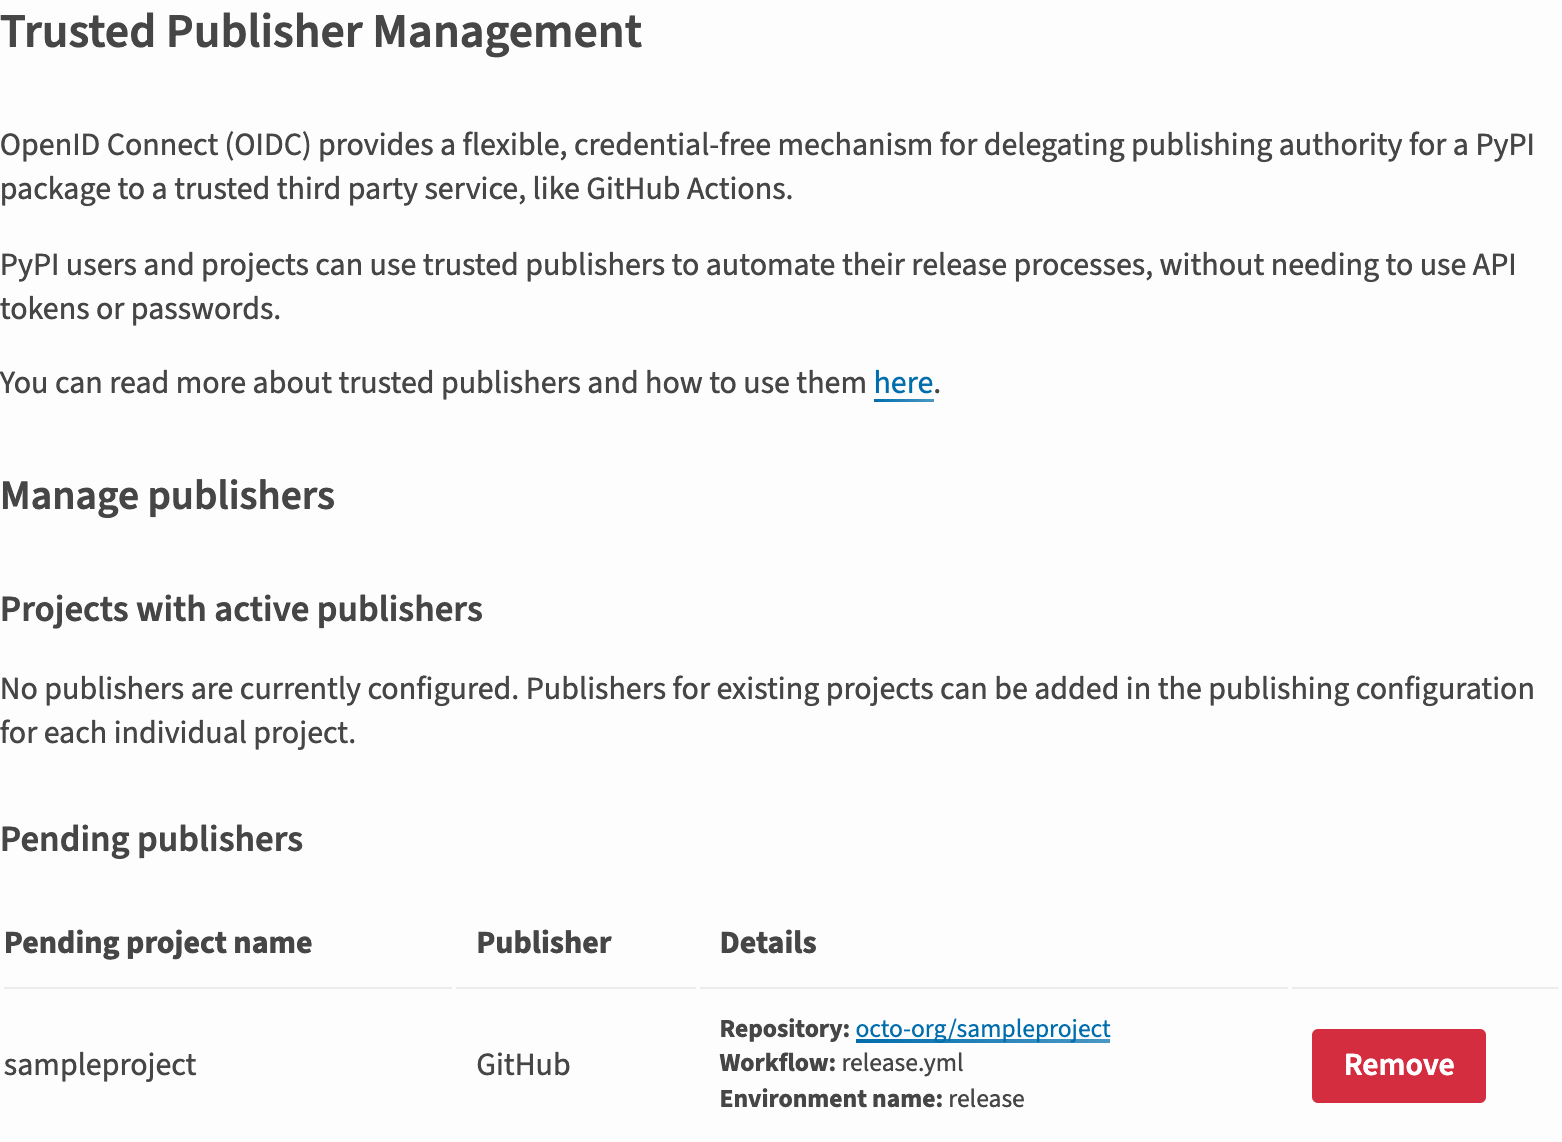
Clicking "Add" will register the "pending" publisher, and show it to you:
If you have a service account named
SERVICE_ACCOUNT_NAME@PROJECT_NAME.iam.gserviceaccount.com, which is in use by
the environment where you would like to publish to PyPI from, then you would do
the following:
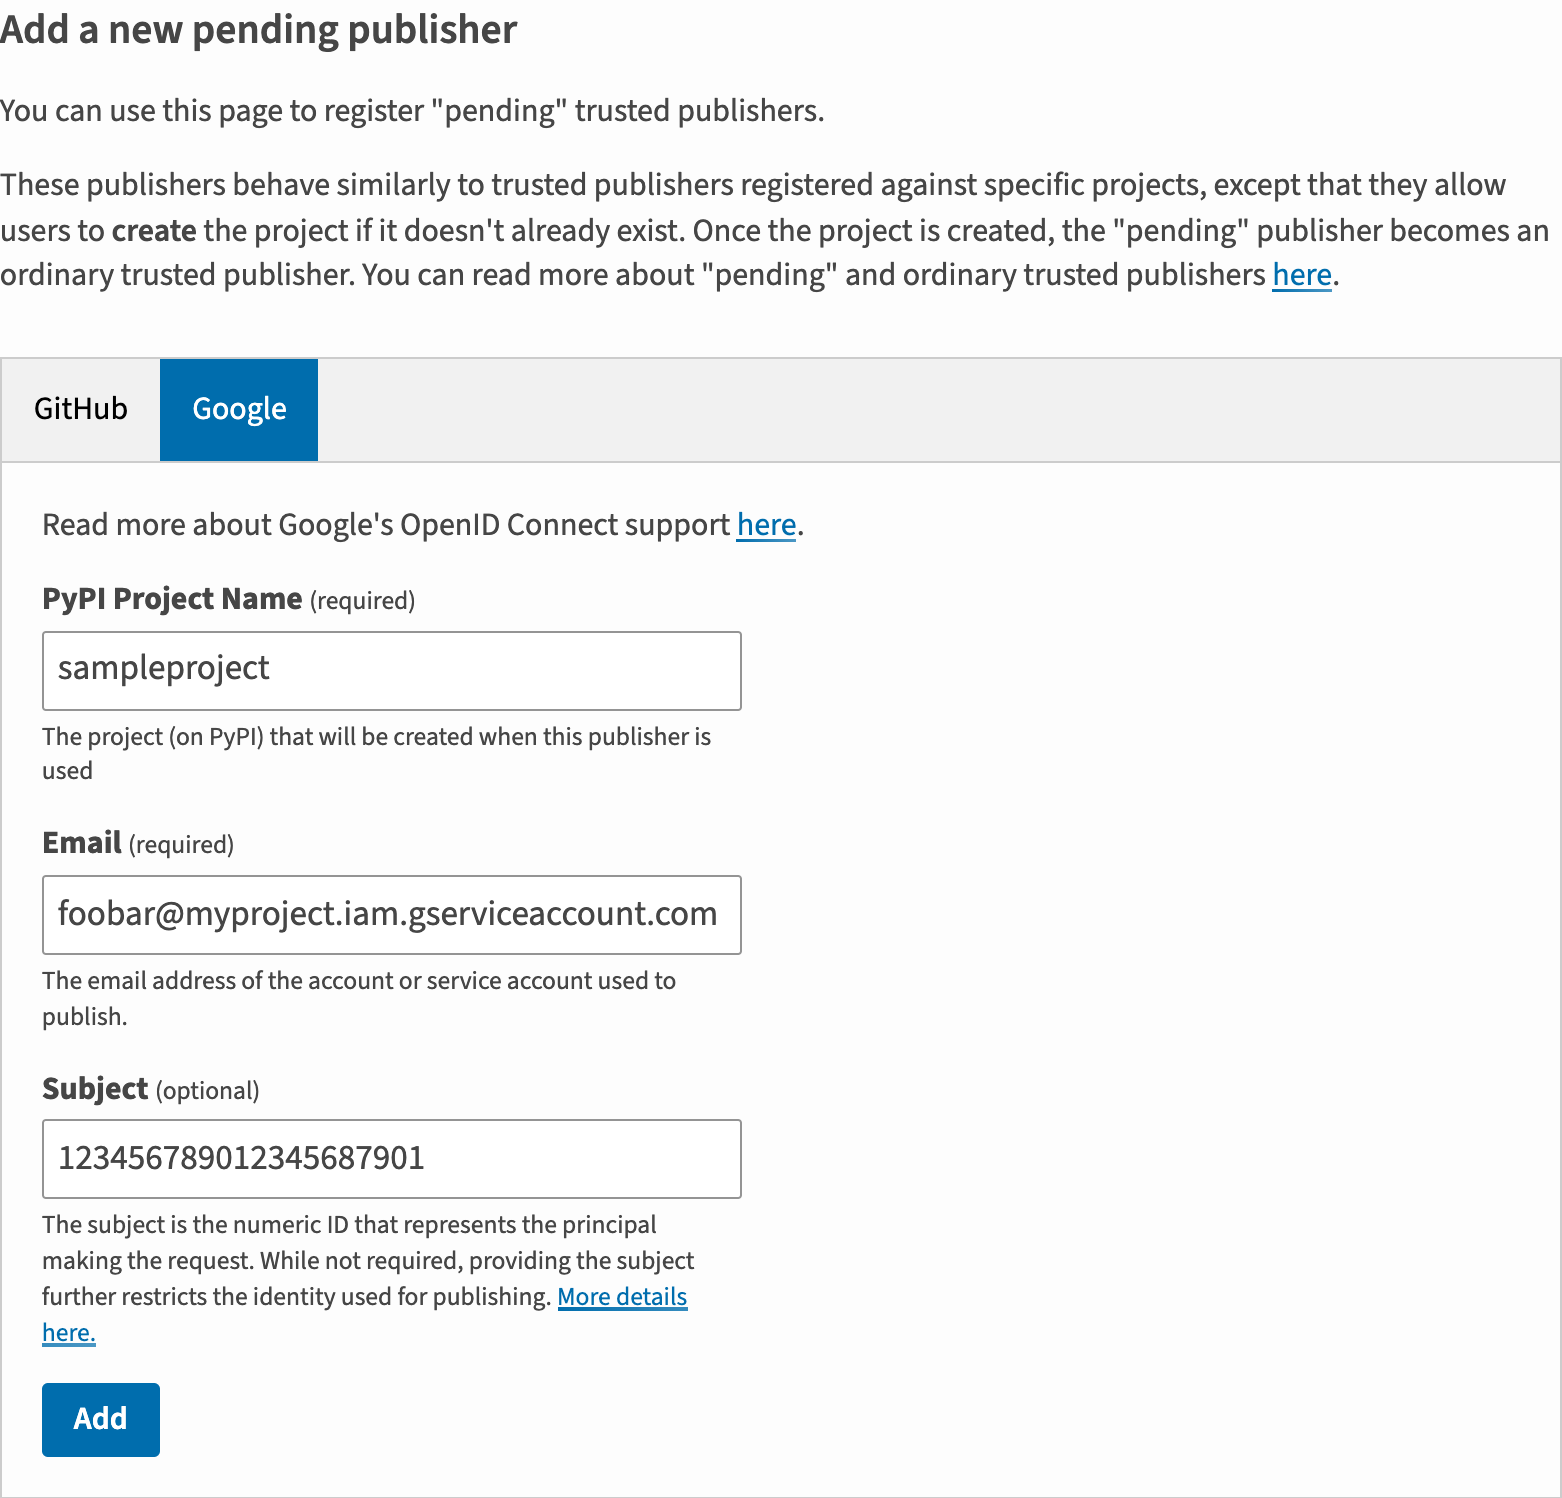
Note
Like with "normal" Trusted Publishing, configuring the subject is optional.
Clicking "Add" will register the "pending" publisher, and show it to you:
Setting up ActiveState to create a PyPI project is the same as updating a project. You need to provide the name of the ActiveState project, the ActiveState organization that project belongs to, and the ActiveState user who will be performing the publish action. Learn more about getting set up on the ActiveState Platform here.
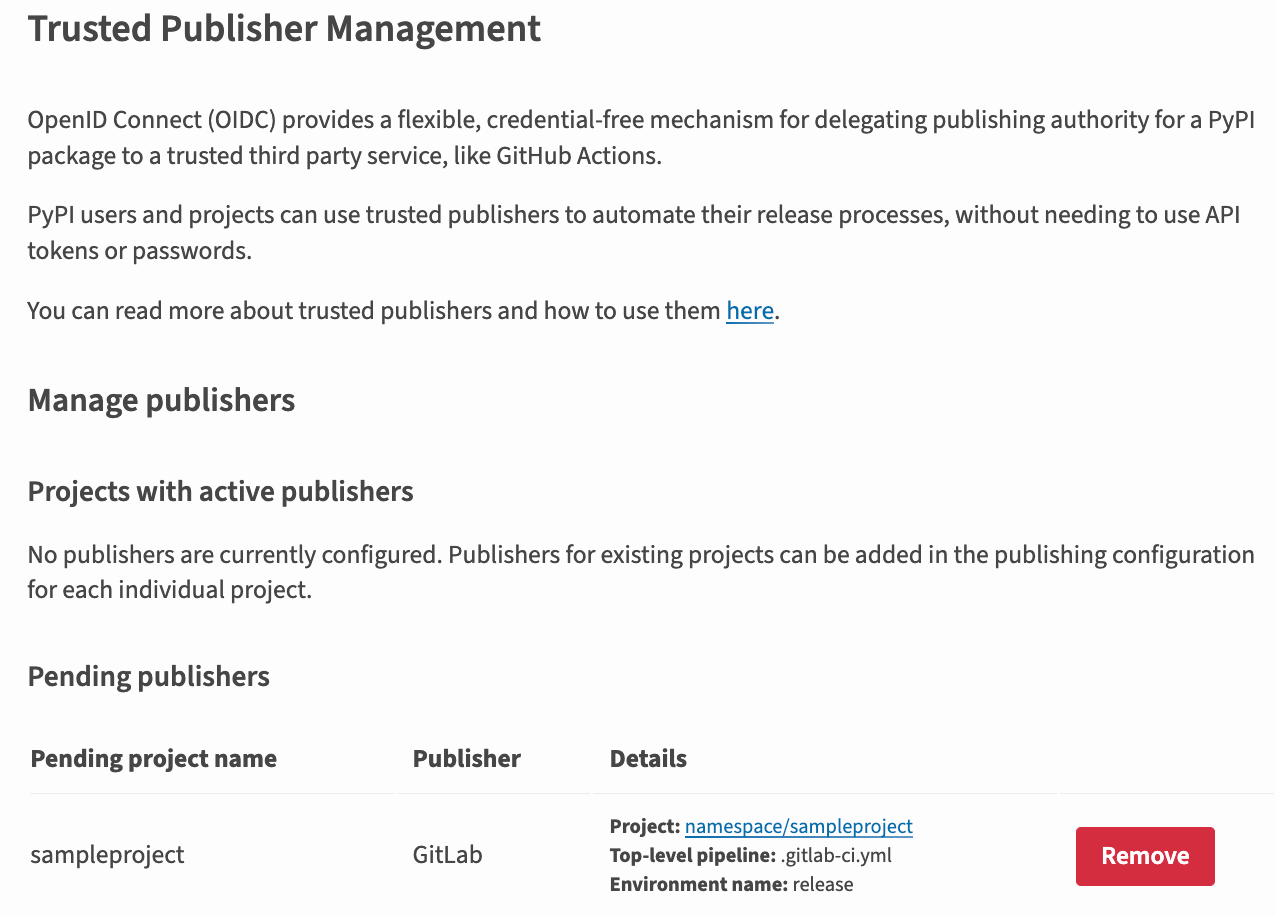
Clicking "Add" will register the "pending" publisher, and show it to you:
Note
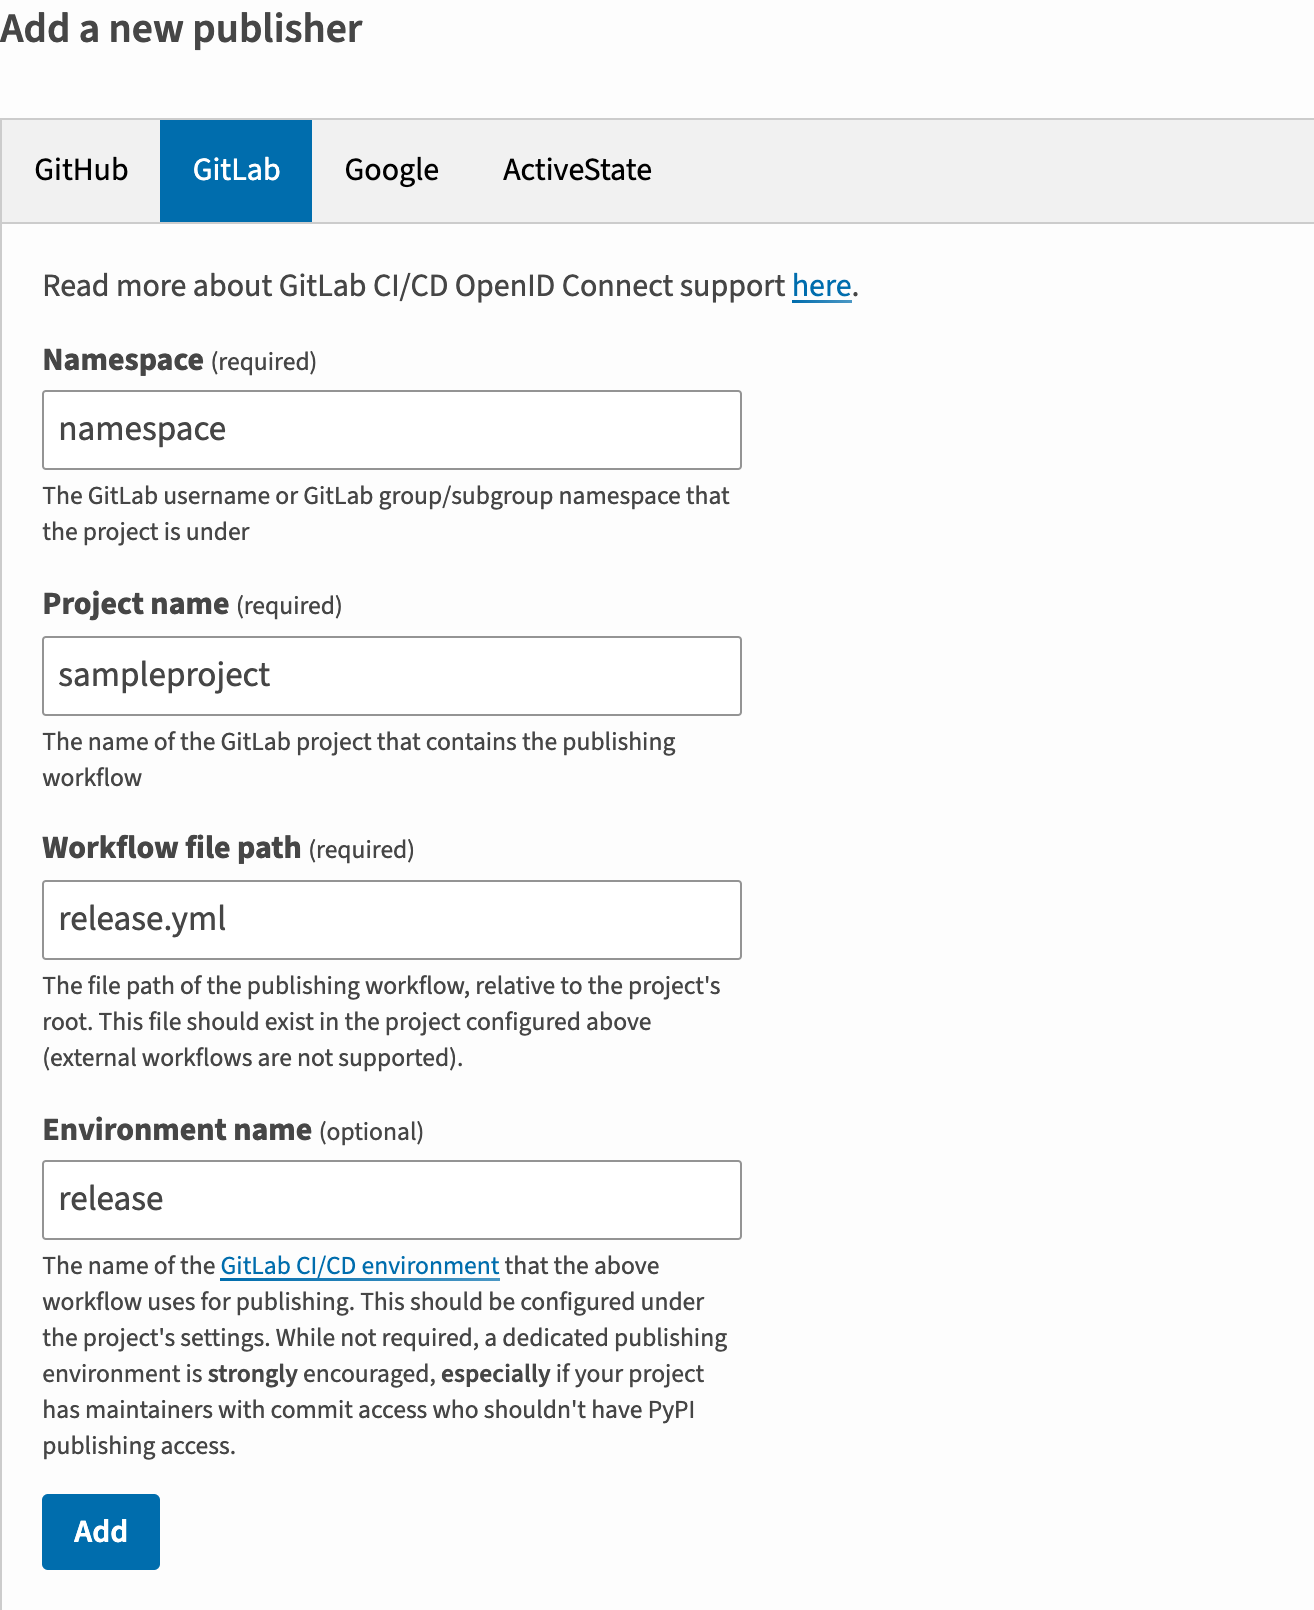
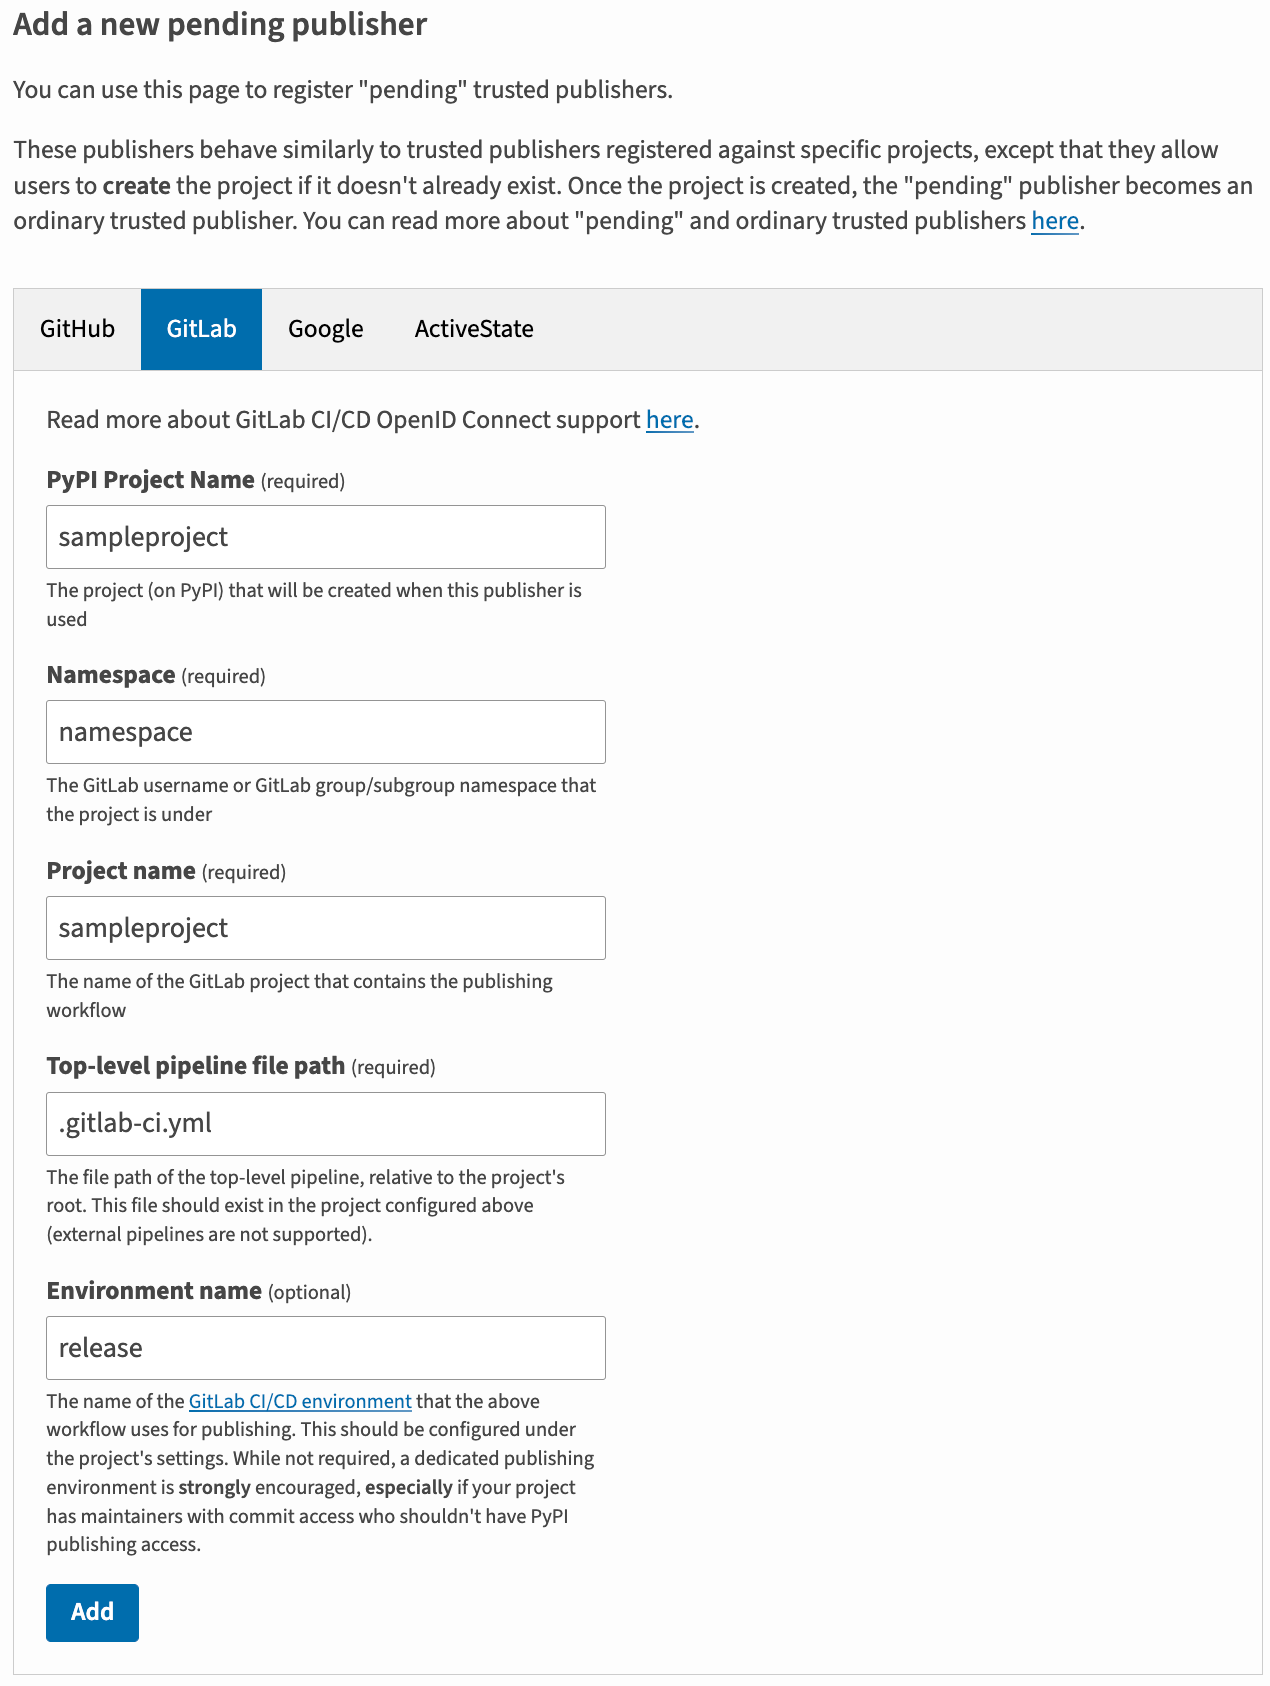
Currently, only projects hosted on https://gitlab.com are supported. Self-managed instances are not supported.
If you have a repository at
https://gitlab.com/namespace/sampleproject with a top-level pipeline defined in
.gitlab-ci.yml and an environment named release that you would like to publish
to PyPI as sampleproject, then you would do the following:
Note
Like with "normal" Trusted Publishing, configuring a GitLab CI/CD environment is optional but strongly recommended.
Clicking "Add" will register the "pending" publisher, and show it to you:
From this point on, the "pending" publisher can be used exactly like a "normal" publisher, and after first use it will convert it into a "normal" publisher.